First Steps
This walkthrough guide for MoneyHash will help you quickly get started with our platform and make your first payment. Before diving in, you need to go to MoneyHash Website and sign up for your free trial, which will create an organization for your business and send you access to our dashboard via email. Once you receive an invitation via email, you need to set your account password and proceed to the Login page.
With your access in hand, you can start with the initial steps below that will give you a glimpse of how to use MoneyHash and integrate it smoothly into your applications efficiently.
Step 1: Using MoneyHash in Test Mode
For the purpose of this walkthrough, you need to have Test Mode activated. To do so, you need to click Switch to Test Mode in the top right corner. If the Test mode is already active, you can skip this step.
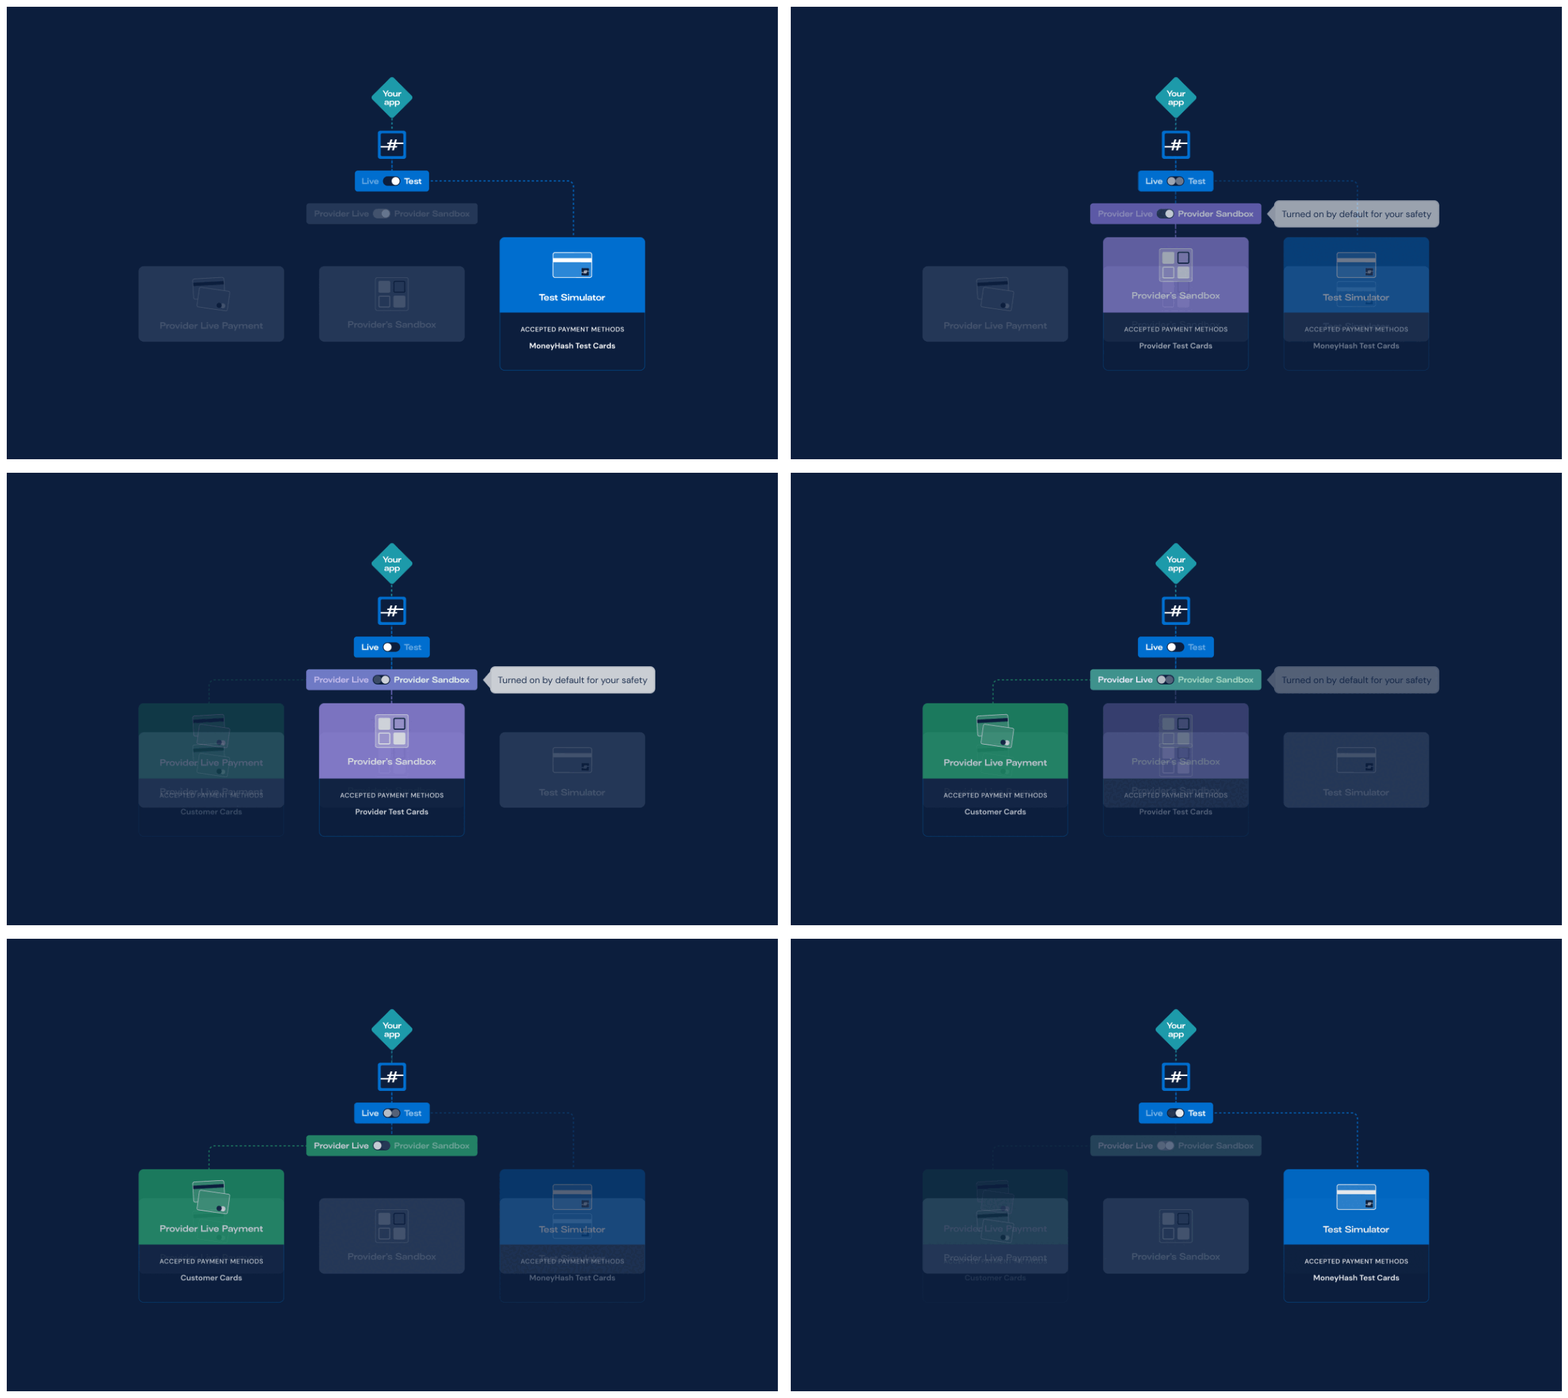
The MoneyHash dashboard works in two separate modes:
- Test Mode: MoneyHash provides a Test mode for its users to simulate real-world payment transactions without waiting for credentials from payment providers. This feature enables you to integrate easily and instantly with the system using generated data. You don't have to worry about whether a payment is a live or test transaction.
- Live Mode: The Live mode in MoneyHash requires integration with real payment providers and actual credentials, which customers will see when using MoneyHash.
- Live Mode with Provider's Sandbox: After successfully navigating the Testing Phase, you'll change your account to Live Mode on the dashboard. You need to provide real information to connect with the provider at this stage. Some providers offer a sandbox environment, allowing you to test processes like payment creation and capture.
- Live Payment Integration: This stage involves real data for payments, resulting in actual financial transactions and cash movement within the system.
Active mode
The current active mode will always be shown at the top-left part of the dashboard, so you will always know which mode you're on currently.

Step 2: Setup your first account
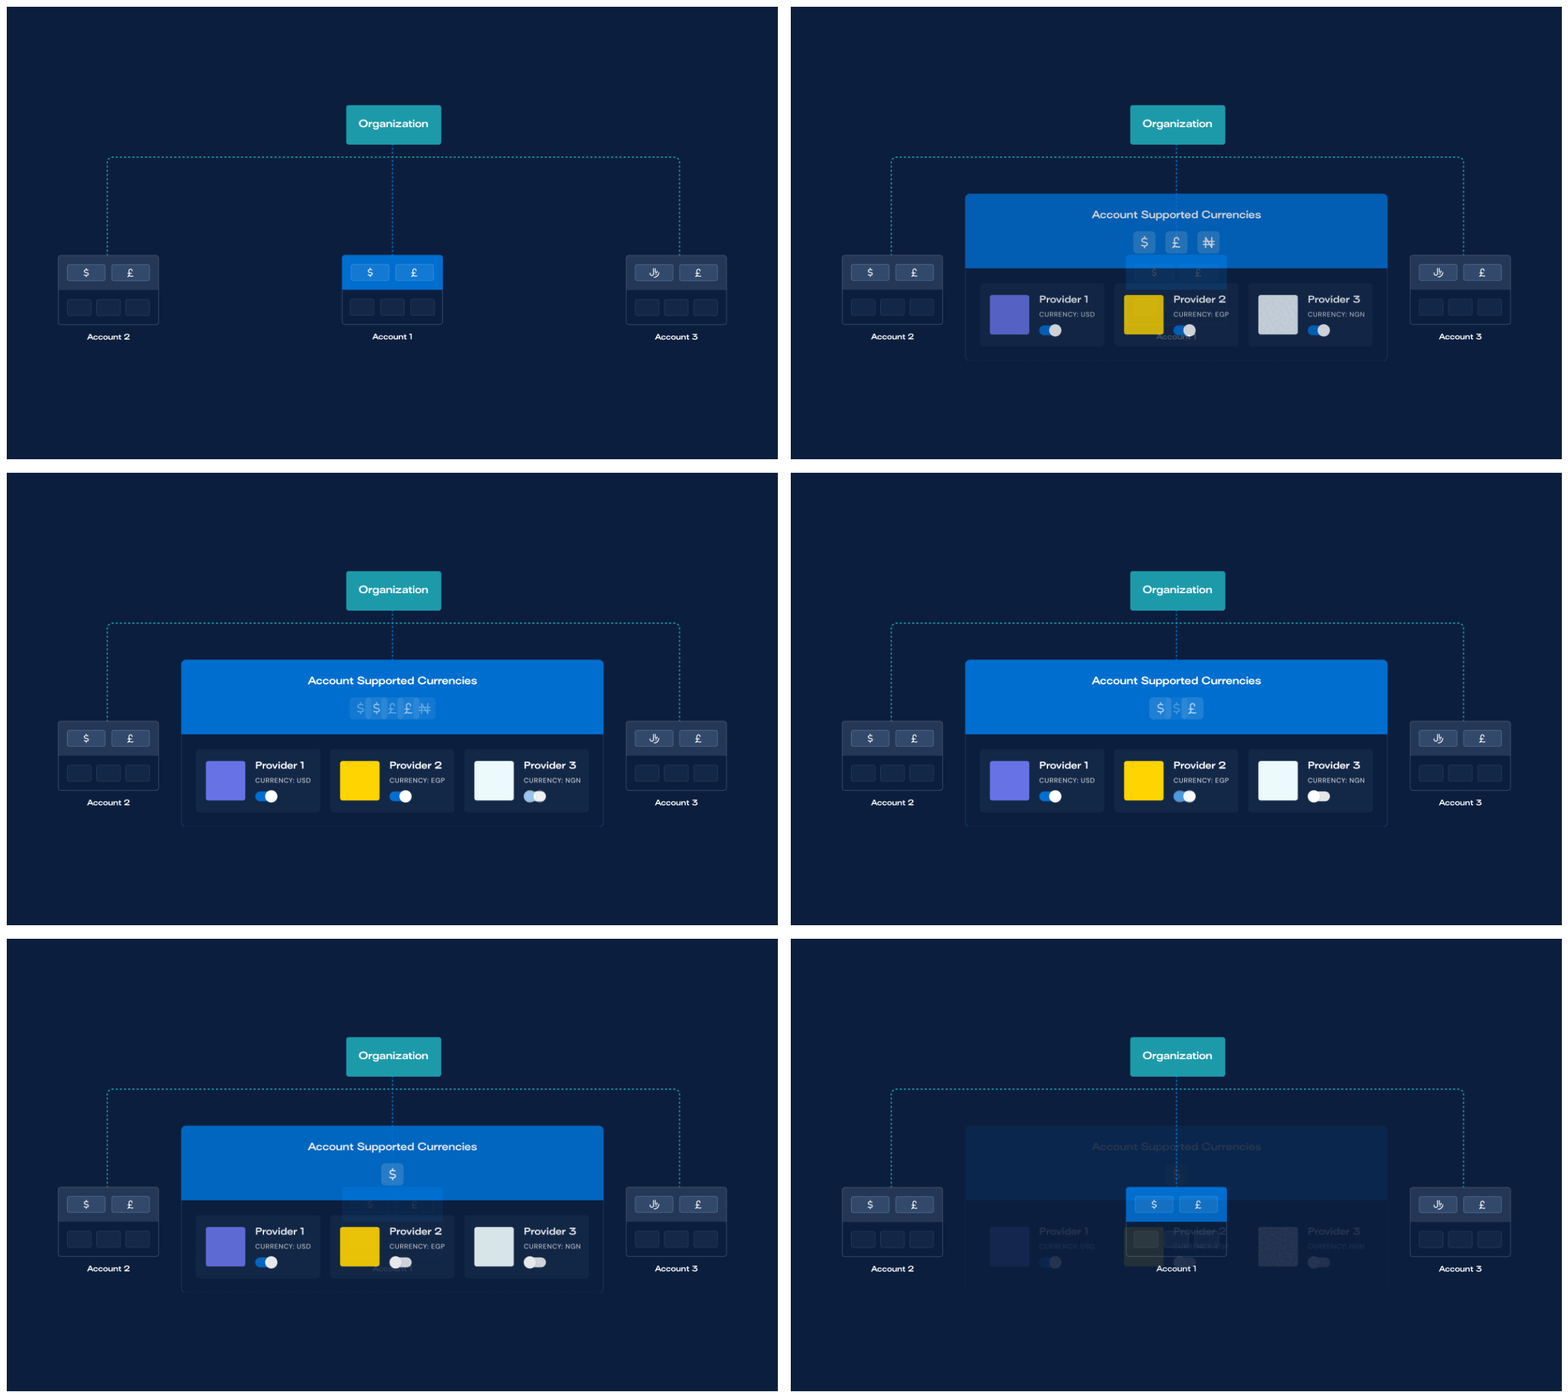
In MoneyHash, the Account module helps you organize your payment stack according to your business requirements. You can use a single account for your entire business or create multiple accounts for different aspects of your business, such as geographic locations, platforms, products, or sub-merchants. You may also create an account for testing purposes only. You can create an account by following these steps:
- Access the Account tab on the MoneyHash Dashboard inside the Organization section.
- Click the "+" button on the right side to create a new account.
- Add a Name to the account.
- Save your new account.
Step 3: Setup your first API keys
An API Key is a unique id that allows you to interact with our APIs securely and prevents unauthorized access to your data. API keys are essential for interacting with our APIs, whether for production use or for testing while developing your application.
There are two types of API keys:
- Organization API Key: Used for creating and listing accounts inside an organization.
- Account API Key: Represents a single account and is used to create and list all different entities that belong to an account, including payments!
You can create an account API key by following these steps:
- Access the Account API Keys tab under the Integrations section.
- Click the "+" button on the right side of the screen.
- Set a name for the new key.
- Link it to an existing Account.
In the Account API Keys tab of the dashboard, you can see all your created keys.
When you create an account in Step 2, MoneyHash automatically generates an Account API Key connected to this account.
Step 4: Connect your first provider
A payment provider is an intermediary service that acts as a gateway, offering payment options you can provide to your customers at the checkout. These payment options include credit cards, debit cards, digital wallets, bank transfers, and more.
Our Directory of Providers shows each provider as a card with summarized data about this provider, such as supported countries and payment methods. You can click Learn More for detailed info about each provider.
After choosing the desired provider, you need to do the following quick steps to connect said provider:
- Click Connect.
- Select the account created in Step 2 to connect the provider to it.
- Add the required data under the Global Configuration credentials. You can add dummy data on the required fields for the Test Mode.
- Toggle the Active button to connect the pay-in methods to your account.
- Enable the payment methods you want this provider to accept.
- Click Finish.
You successfully connected your first provider.
Each provider integration has to be connected to one of the Account you created earlier. A single provider can be added to multiple accounts, but you will have to do the full cycle of integration instructions for each account separately.

Step 5: Make your first payment in MoneyHash Sandbox
MoneyHash offers a Sandbox environment hat allows you to simulate all API functionalities.
The sandbox has a pre-loaded default account keys that allow you to simulate the full API cycle. You can use your own Accounts keys to simulate your own cycle.
On the left side of the Sandbox, you can see the payload along the headers that contain the Account API key and some pre-configured examples. You will find the embed experience and the JSON returned from the request on the right side.
Below, we break into small steps to use our Sandbox environment:
- Select your newly created account and its respective account API Key.
- Configure the Scenario section. You may use one of the pre-configured data.
- Check if the provider you integrated accepts the currency from the payload. If not, change it to a currency that fits one of your providers.
- Click Submit.
Pre-configurated payloads
MoneyHash supplies a great variety of examples ready to use, making the task of testing easier. We recommend exploring these examples a little to understand a bit more about all you can do our Super-API.
You successfully started your first payment. Now you can interact with the embedded experience on the right to make the payment.
Next Steps
After successfully completing your first payment and getting a glimpse of what MoneyHash can do for you, we recommend you take a look at the Next Steps page to better understand what you need to take full advantage of our solution.
Updated about 2 years ago